
Definition
Forms allow you to create simple user interfaces that bring together all the data needed to complete tasks.
What does a form look like?
Configuration view
User view
Form configuration
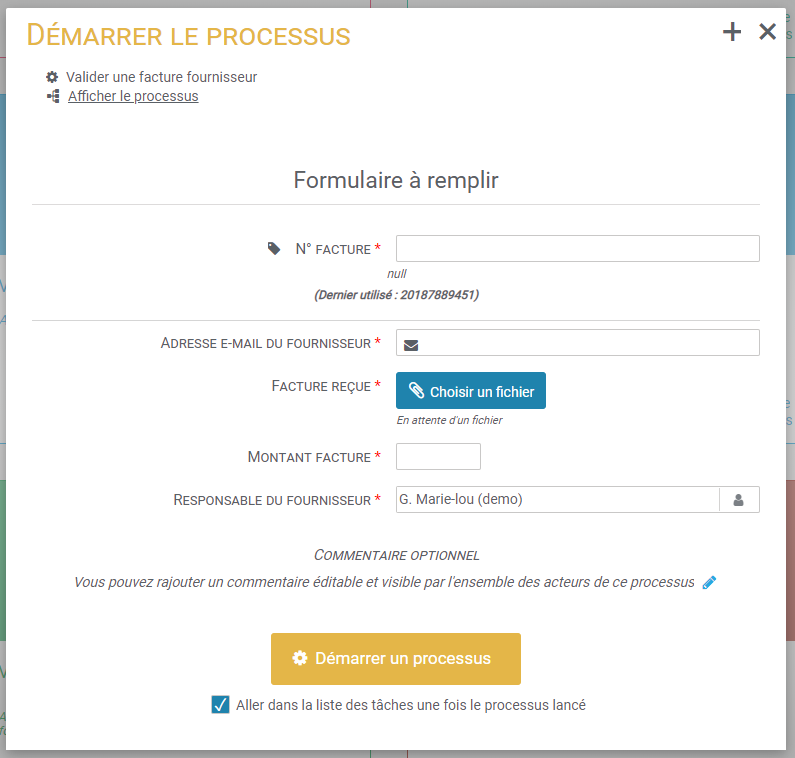
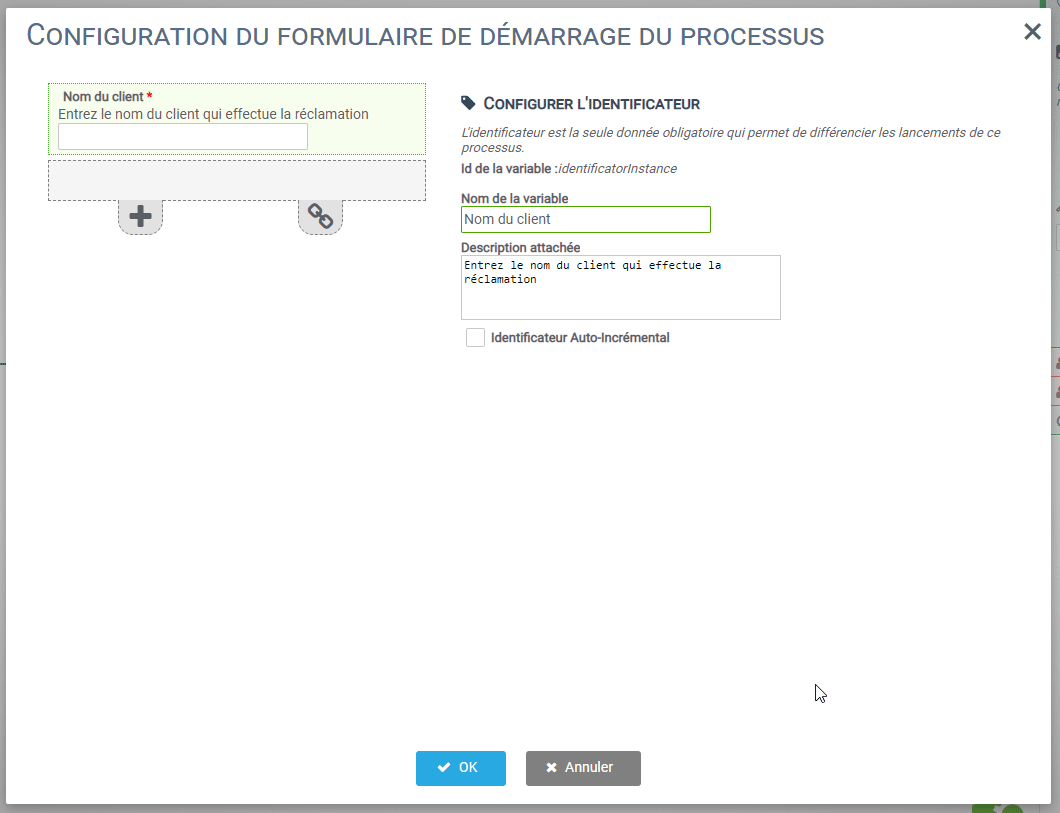
Setting up the start-up form
After you have modeled your process and clicked on “save,” you are redirected to IteropDesign in the Configuration interface. In IteropDesign, on the right column, you have access to all the configuration data. One of the first steps is to configure the form to start the process. That is, the form that will be displayed when users launch the process.
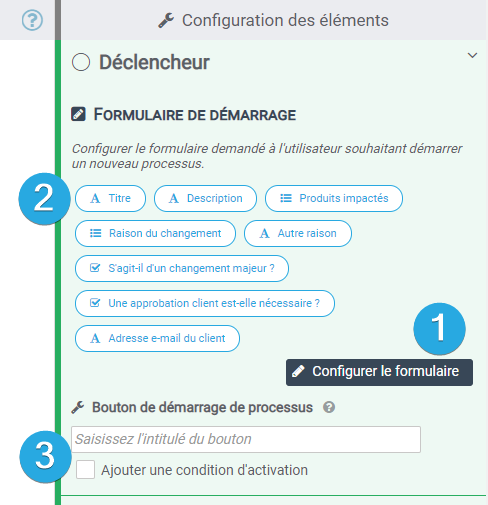
1️⃣ The button “Configure a form” gives you access to the configuration of the data to be displayed
2️⃣ The labels corresponding to the data you have configured
3️⃣ Allows you to define the title of the button when launching the “Validate the request”, “Save the order” … process.
N.B: It is possible to integrate HONEY in the name of this button.
Example: Validate the document: ${document_a_valider_id}
Will give: Validate document : Computer purchase estimate
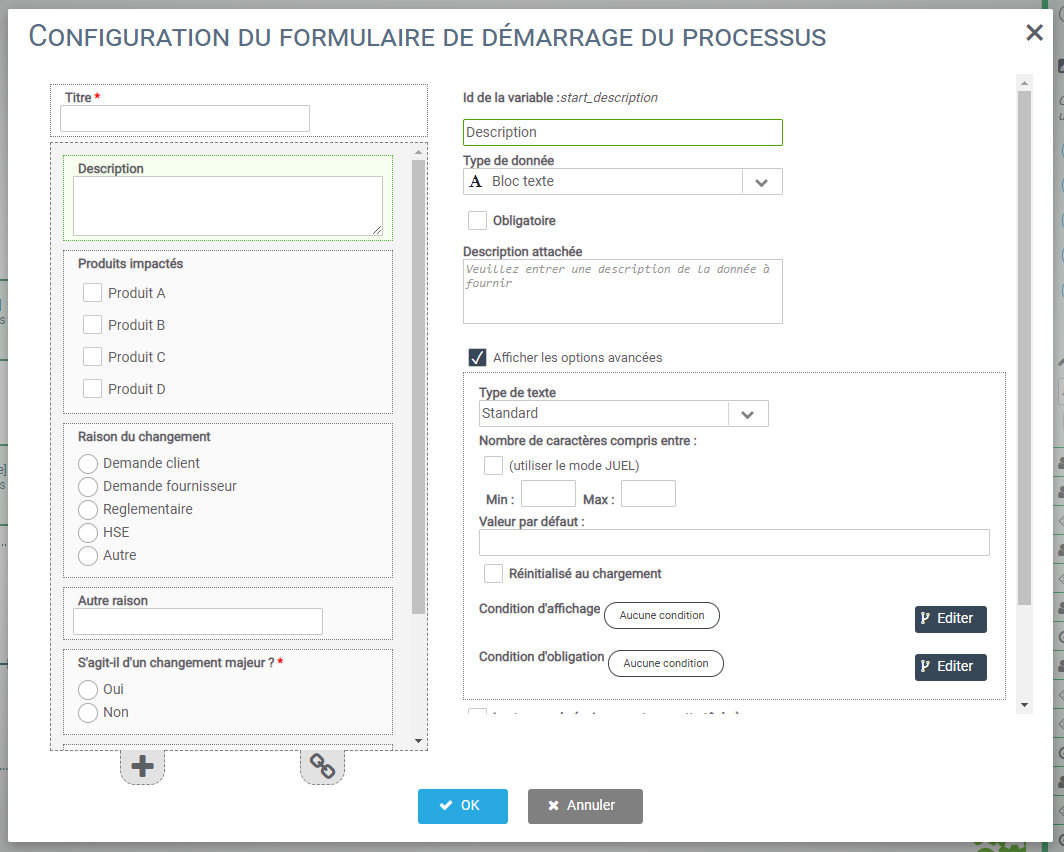
Here is an overview of the configuration system:
All forms run on the same configuration system.
- Just click on the “+” button to add a field. On the right-hand side, you define the field name, type and advanced options.
- Click OK to validate.
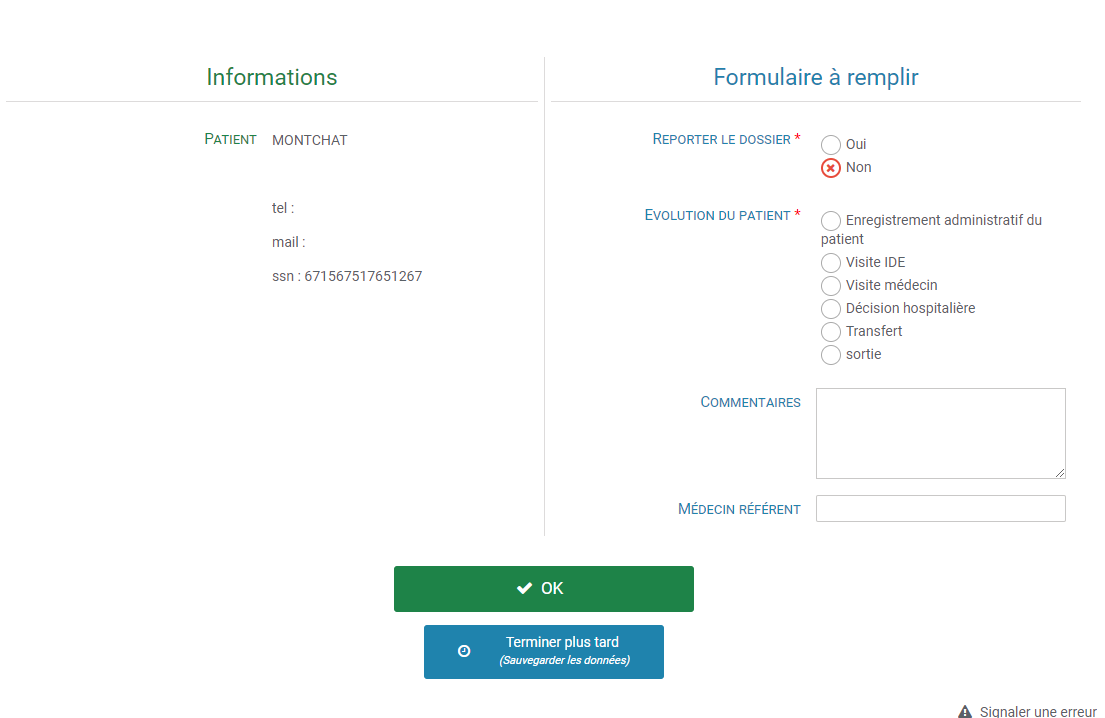
Configure built-in forms for tasks
In the configuration of your process, you can set up forms on each task (unless there is no information to communicate).
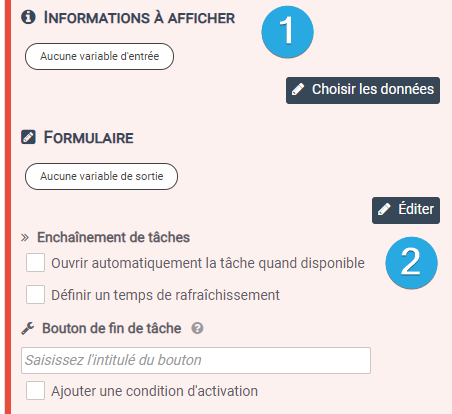
1️⃣ Information to display
2️⃣ Form to be completed

In this type of form, the configuration system is the same.
The method changes when it comes to configuring the information to be displayed.
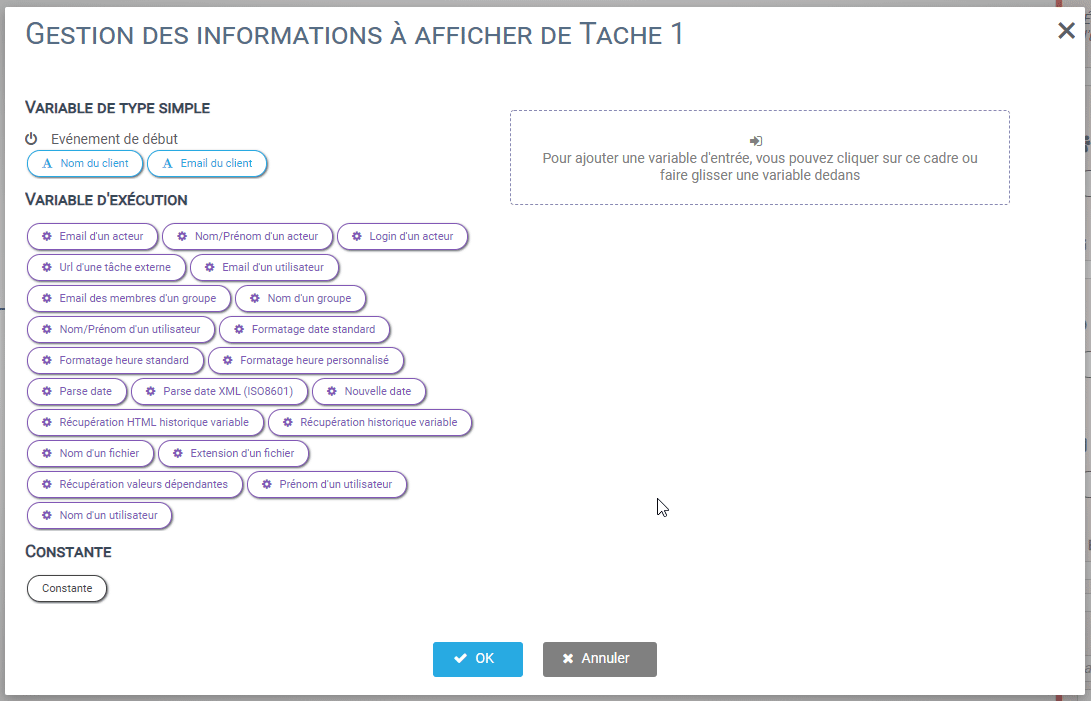
- Click on Select Data (to display)
- Drag and drop the data you are interested in
- Click on OK to validate

