Tutorial: Preparing for the REST call service
I. Creation of the service
- Go to your space Design more precisely in the ” Services ” tab.
- First we need to create a service of type REST.
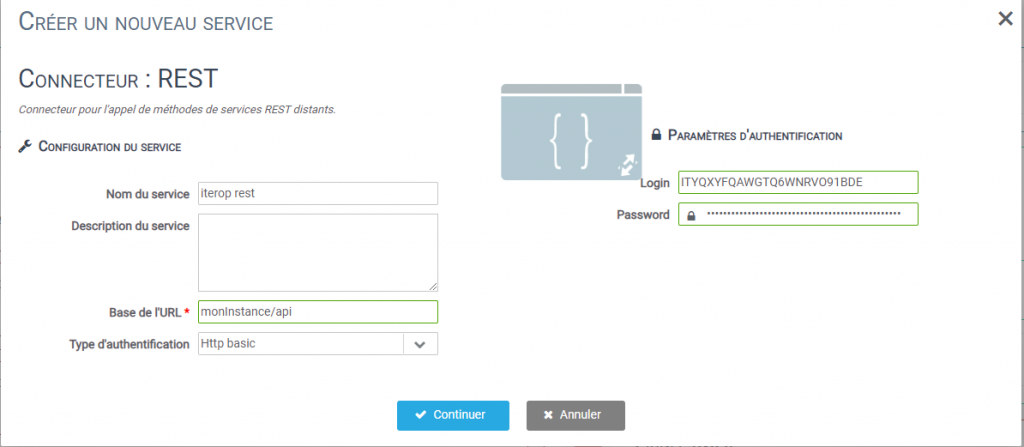
- To do this, click on Create a new service in the top right corner of the service configuration page, then select the service type : REST.
- Name your service and add a description if you wish.
- Now fill in the field url base with the path to your api: https://www.myInstance.iterop.cloud/api
- Now choose your authentication type, in our case we will use the ” HTTP basic “.
- Fill in the authentication data with your API accesses.
- Finally, click OK, you will be redirected to the Service Transaction Structure window.
II. Creating a Simple Operation ( GET )
Once your department is created, you will assign it a set of operations, a number of methods. In this first case, we will see how to create a simple “GET” call to retrieve a list.
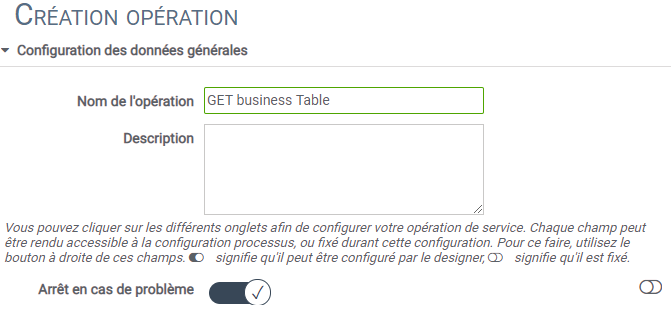
- Name your operation for our example, I chose a GET method: Get business table
2. Once your operation is named, click on the tab below Path Setup and fill the field: ” path HTTP ” with the end of your URL. In our example, it would be “tables/tables”.
3. The field Address updates and should display the full path corresponding to the method: https://monInstance.iterop.cloud/api/table/{tableId}
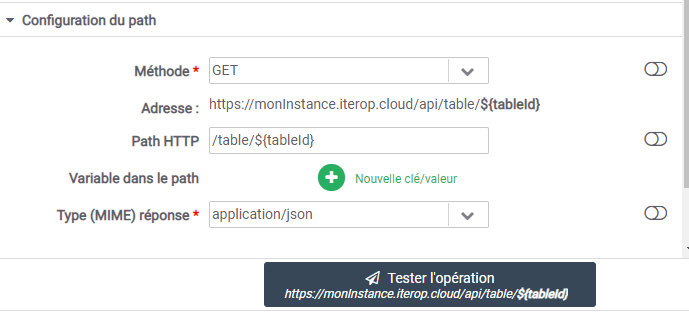
As you can see in our path, we have a “tableID” variable. So now it has to be declared and set up.
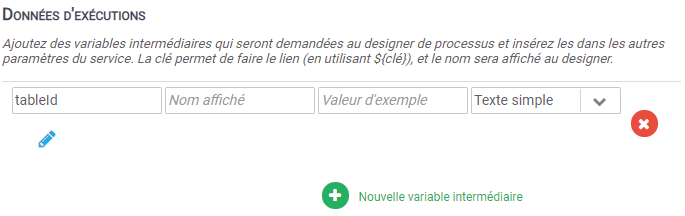
Go to the execution data part and add a new intermediate variable.
- In the part key, copy the name of the parameter, “tableId” in our case.
- Now add a ” $ ” in front of the variable in the path. So we have for path: table/${tableId}.
Click on Test operation. An intermediate window asks you for a value for tableID, now enter the ID of the table you want to retrieve.
5. Your procedure is now functional.
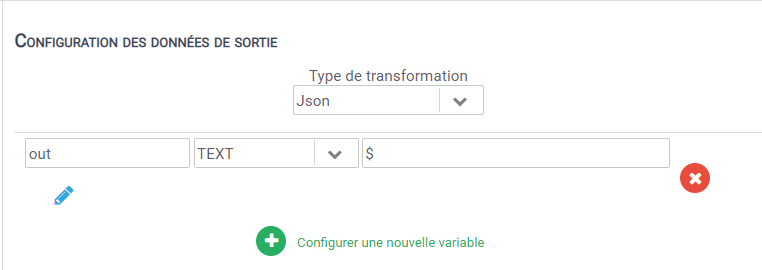
6. You just have to specify to Iterop in which variable you want to put the query response to find it in your process. In the Configuration Output data pane, at the bottom right of the window, select the type of transformation: File. Then click on configure a new variable.
7. Name your variable and click OK.
III. Creating a complex operation ( POST )
We will now see how to create a more complex query that will use in addition to the so-called Path params, a body.
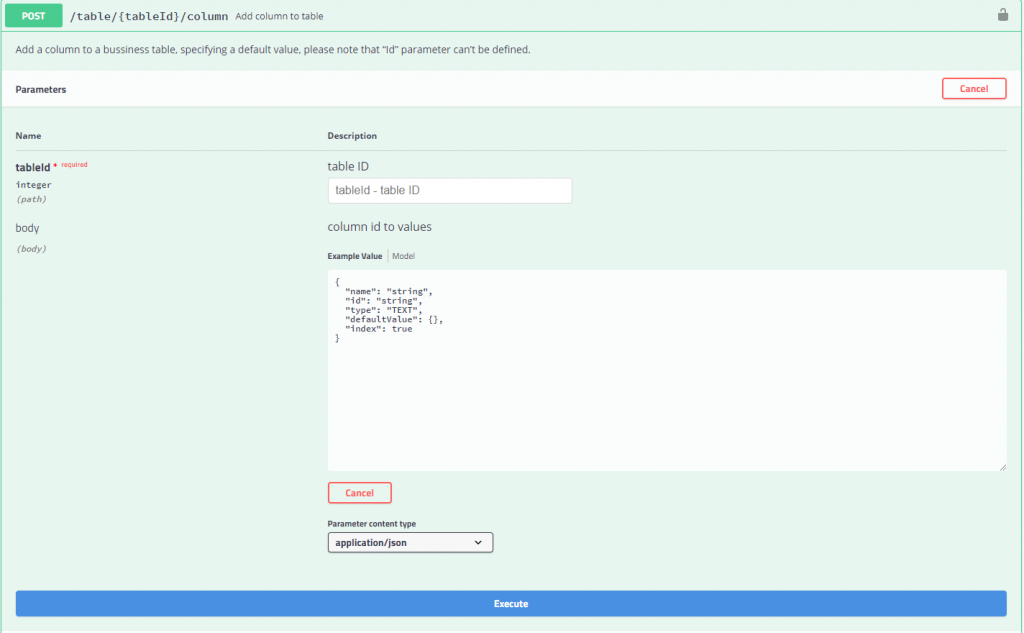
For this example I chose to show you how to add a column in a business repository. To do this, go to the internal documentation of your instance to find all the information necessary for the request.
A- General configuration of the request
- Create now in your service a new operation.
- As in the second part of this tutorial, start by giving a name and description to your operation.
- Set the method to ” POST “. (“GET” being the default )
- Now add le path, in our case: ” /table/{tableId}/column “.
- Check that the complete link is correct. ( You can find it under : test operation )
- Configure the type (MIME) response based on the return you expect. ( In our case, we leave by default : application/json )
B- Configuration of input parameters
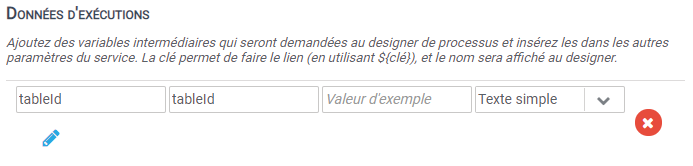
As with the GET method, the request needs an ID in parameter.
- Add “tableId” in the top right corner in the runtime data.
- Add a ” $ ” in front of {tableId} : /table/${tableId}/column
C- Body configuration
- Go to: Query configuration.
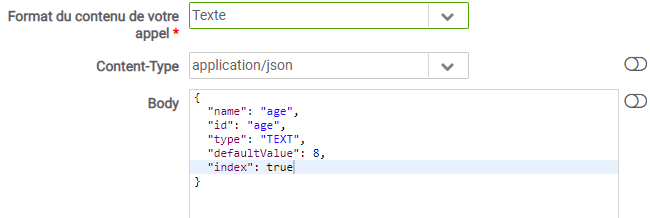
- Select the content format, you can find this information in the query documentation below ” Parameter content type “. For our part, it will be “application/json”.
- Copy the sbody structure present in the documentation then paste it in the ” body ” part.
- Then adapt this skeleton as you see fit. Be careful to respect the imperatives given in the documentation.
As seen previously, add or not add a output variable at the bottom right if you want to retrieve the query response.
V. Implementation of the service
Before proceeding to this step, check that your queries are working properly with the button, ” Test operation ” and ” Evaluate my variables “.
Go to Iterop Design and create a new template.
- Position 2 tasks of services and one task human.
- Name the first service task “add column” and the second one “get table”. As for the human task, call it “display”.
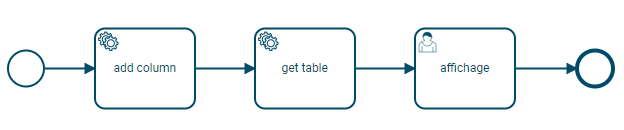
- Click on ” Validate and configure “.
- Add a argument ” table Id ” in the form of the Start.
- Now go to the “add column” configuration, then in ” select service “, choose the operation “Add Business Table Collumn”. After, in ” select data ” select the variable of the Start and drag it into the required field by the operation.

- Then do the same with “Get table”, and choose the operation “Get Business Table”.
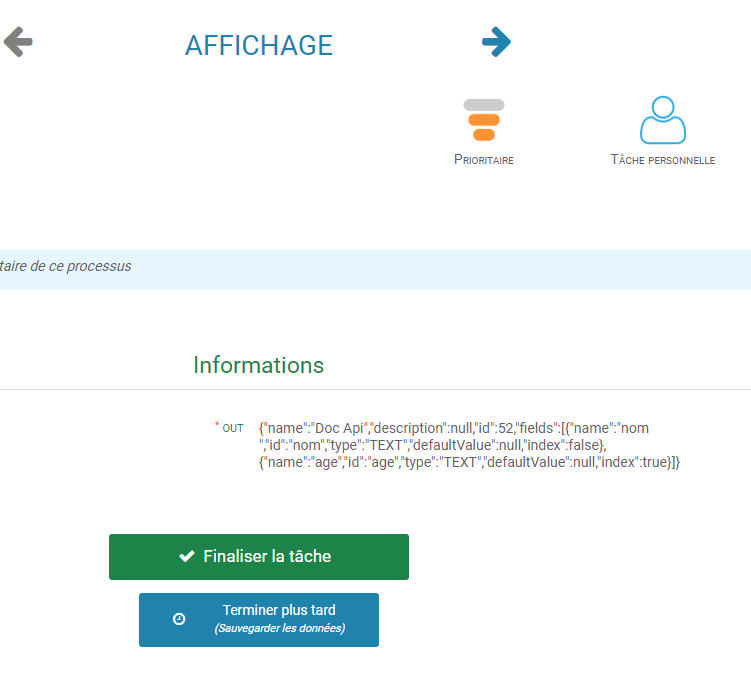
- Now all you have to do is set up the task “Display” by dragging in information to be displayed: Get table: “out”.
Here’s what I get out of it: