How to connect Iterop and Zapier?
Here are the steps to connect your Iterop instance to Zapier.
Connecting Zapier and Iterop
1. Go to your Zapier instance and create a new zap

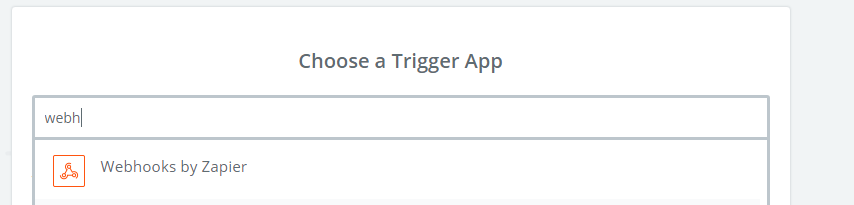
2. You are then asked to choose a “trigger”, this is called a trigger. Choose the trigger Webhook by zapier
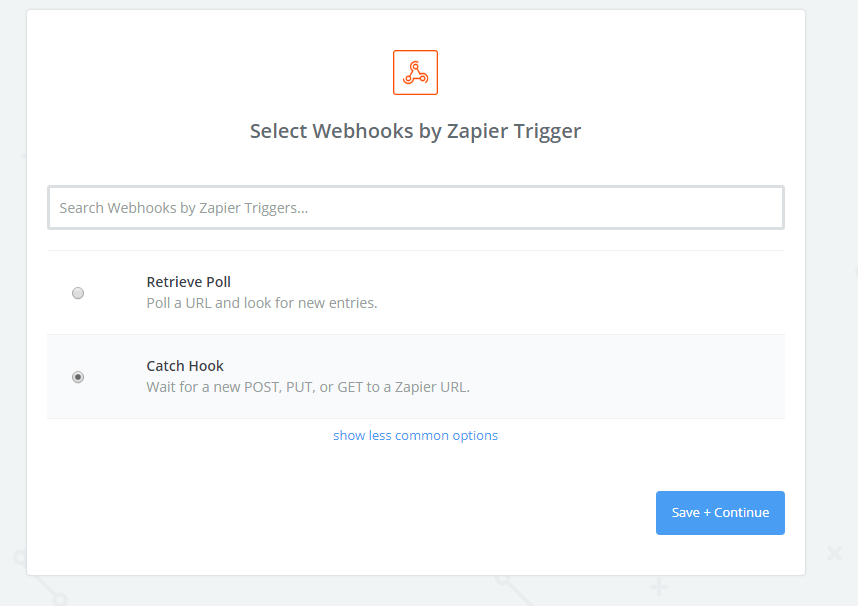
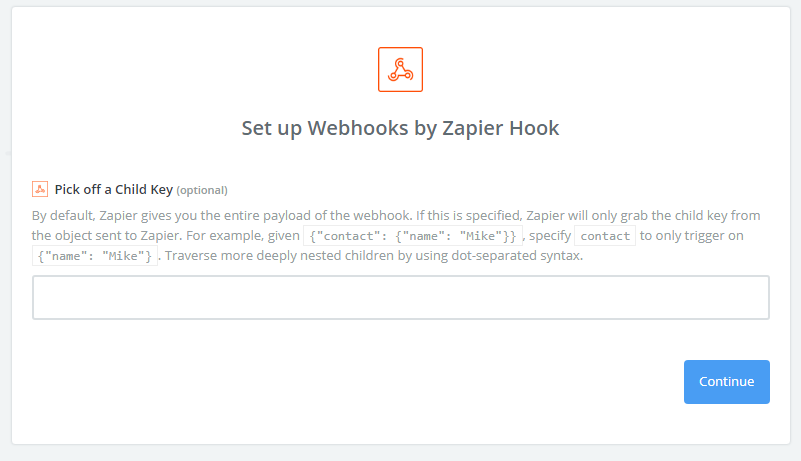
3. In the next window select the Catch Hook option and click on continue. Leave the child key field empty and validate.
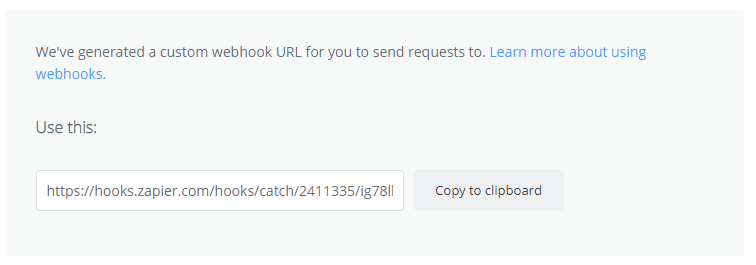
4. Zapier then tells you the address where you will contact your zap.
5. Copy this address to your clipboard, and go to your Iterop instance.
In Iterop:
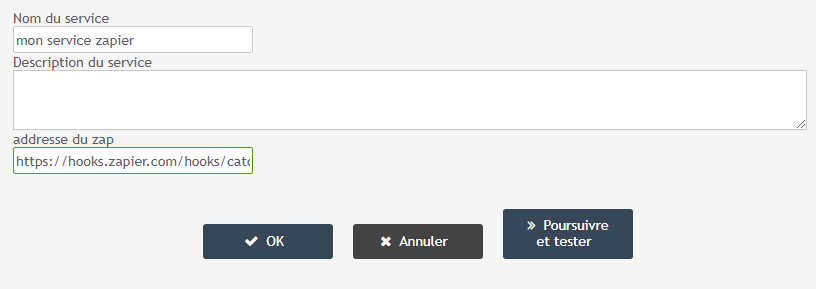
In Design, create a new zap service and paste this address in the “zap address” field. After naming your service, you can validate to define the arguments of your zap.
In Zapier:
Go back to Zapier and define the action you want your service to trigger by selecting in the left pane “action” then “choose App”.

Connect Google Calendar
For this example, we will try to connect to Google Calendar to create a new event.
- Select Google Calendar and choose the action that corresponds to what you want to do.
- Click on “Create detailed event” and validate.
- Zapier then asks you to connect a Gmail account to which the action will be performed. Log in and validate.
- You must then define the different parameters of this zap. You can configure certain fields by directly entering a value in the corresponding field.
- In our example, we can for example define that the event will take place in “the meeting room” and will have the title “discuss the next planning”. Zapier gives you the list of calendars he found via your Gmail account.
- Select the one on which you want to set your event.
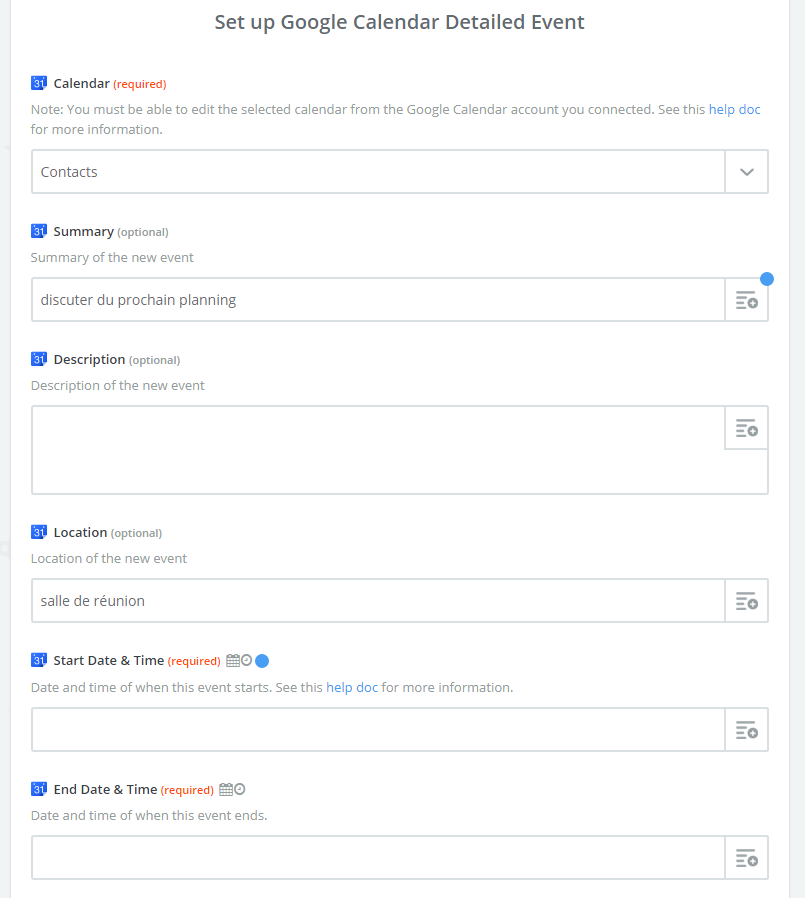
- You now want to define elements that vary according to the context.
- In our example, we want to choose the meeting start date, duration, description and potentially emails to send invitations to.
In Iterop:
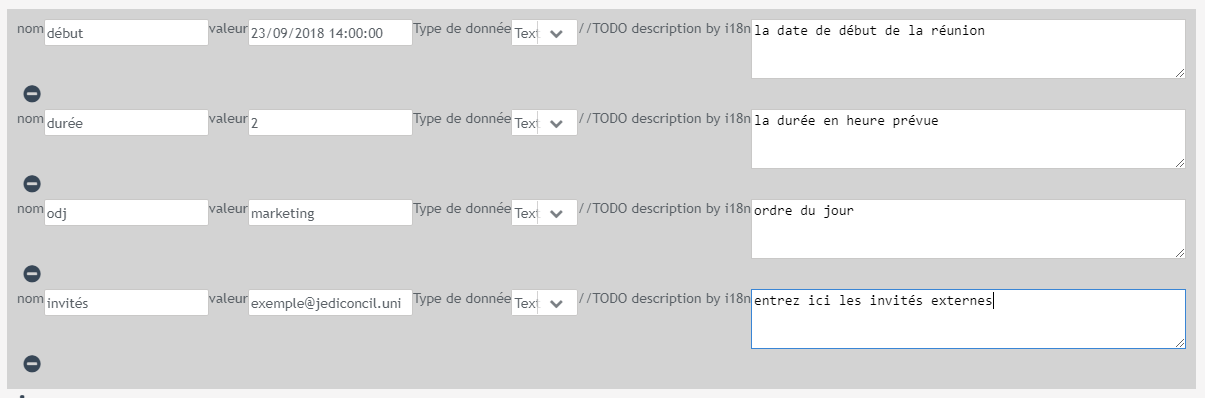
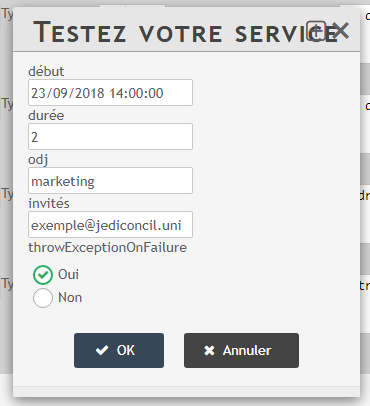
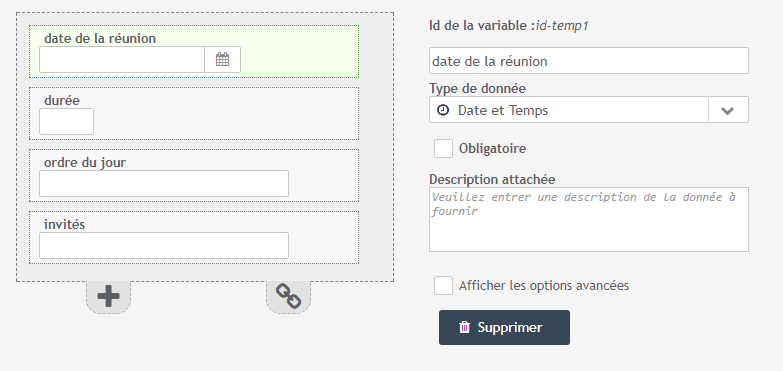
1. Go back to Iterop Design and add as many service variables as there are arguments that can be set. You can enter default values in these variables.
2. Once you have defined your variables, click on “open the test window”. A window will open where you can fill in the different variables you have just created.
In Zapier:
Before validating the test, go back to Zapier, in the configuration of your trigger and select the “test this step” tab. By clicking on “ok I did this”, Zapier will listen for a short while to the address previously provided in order to receive example data.
In Iterop:
You must then click on this button, then return to Iterop and validate the test window.

In Zapier:
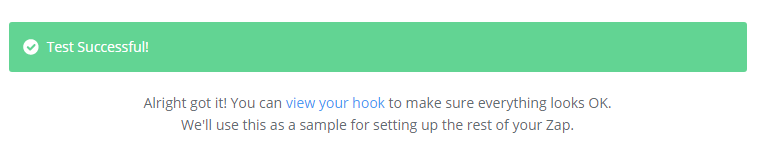
1. When you return to Zapier you will see that your data has been received, click on continue.
2. Still in Zapier, go back to the configuration of your action. You can now select the data from those you have just filled in. In each field, by clicking on the icon at the top right, you will see the different data recovered by Zapier in your test.
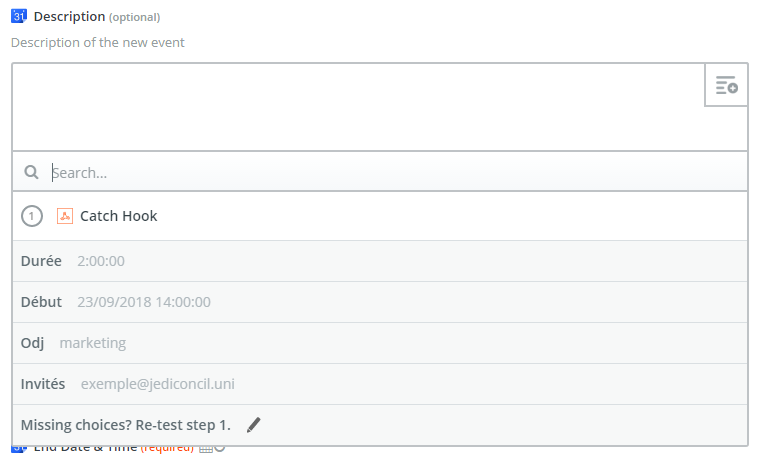
3. Select the corresponding argument for each field and validate.
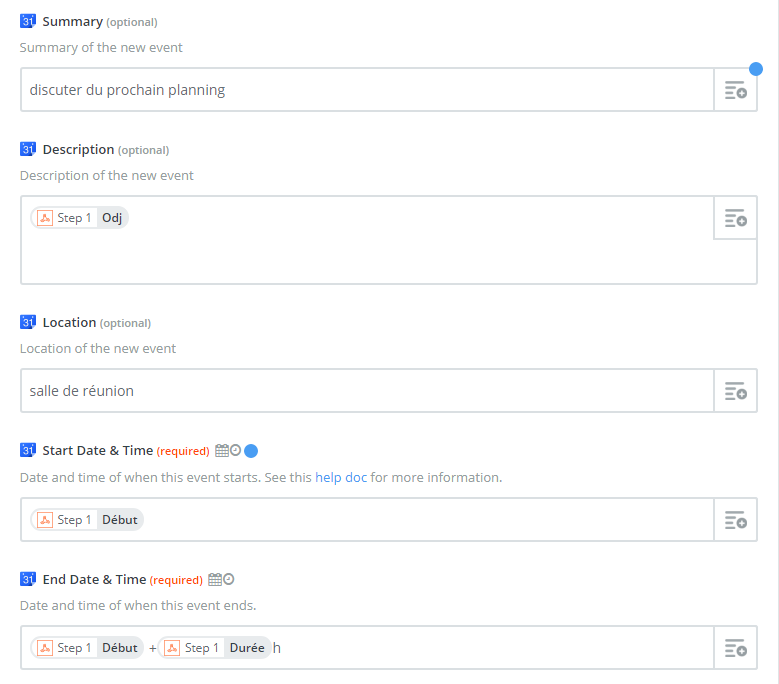
4. Zapier shows you all the arguments of your zap. If everything is correct, click sue “create and continue“, then “finish“. You can go and check that everything went as planned in the instance you contacted (here our calendar)

Designer side
For the designer, it is then necessary to plan to ask the user for the various data necessary for the zap. For our example, we can imagine that a human task will be carried out before the service call to decide the date and the agenda of the meeting.
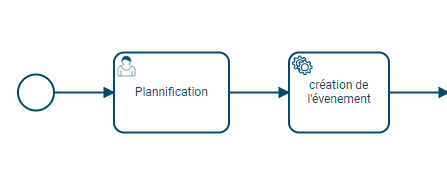
For the task “planning”, we have defined a form requesting the necessary data or at least the data that has not yet been defined in the process.
For the service task, the designer will simply select the desired service and drop the corresponding variable into each field.

Launching an Iterop process via Zapier
Configure Zapier
To get started, log in to Zapier and click on “Make a Zap!

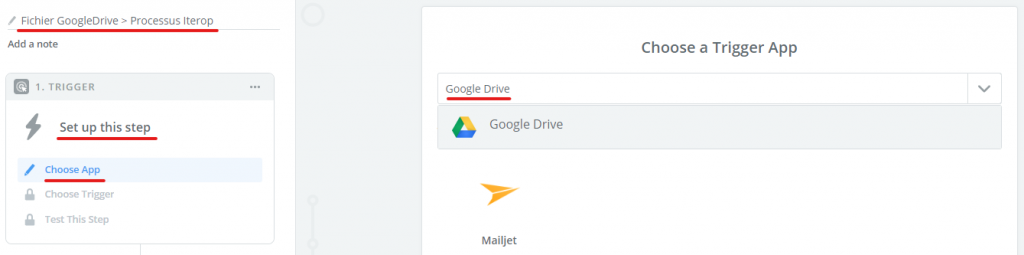
Next, name your Zap “Google Drive File” and open the Trigger Application Choice Panel, search for “Google Drive” for this example.
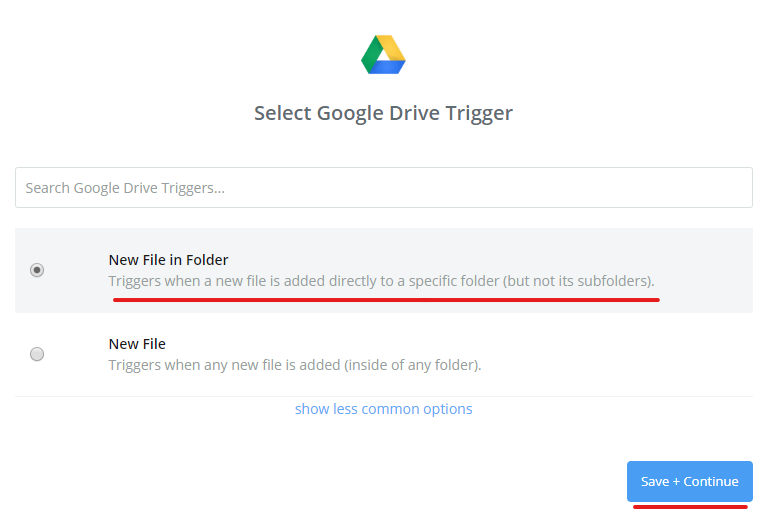
Zapier offers you the possible triggers for this application. We will choose “New File in Folder” for this example.
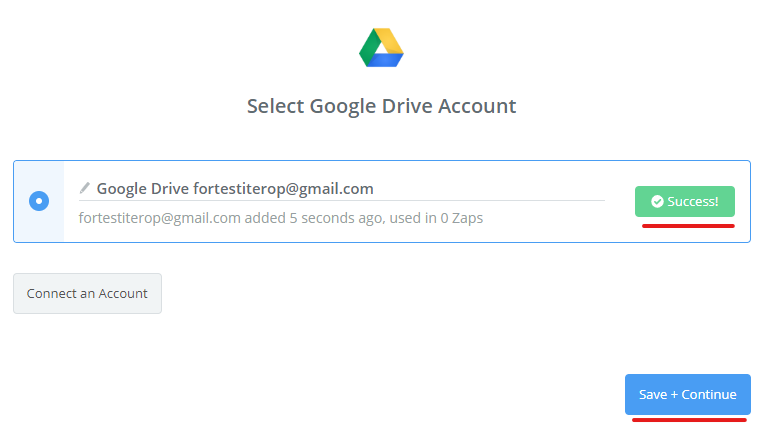
Click on “Connect an Account” to interface Zapier with your Google Drive.

Once the conditions are accepted, your account is interfaced with Zapier.
Click on the “Test” button to check that it works properly.
Finally click on “Save + Continue”.
Configuring Google Drive in Zapier
Then create a directory at the root of your Google Drive and name it “Zapier”.
A configuration window is proposed.
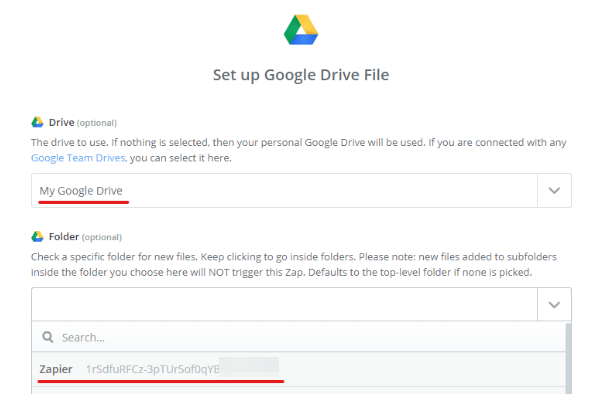
In “Drive”, select “My Google Drive”.
In “Folder”, select your previously created folder. Here we choose “Zapier”.
Then click on the “Continue” button.
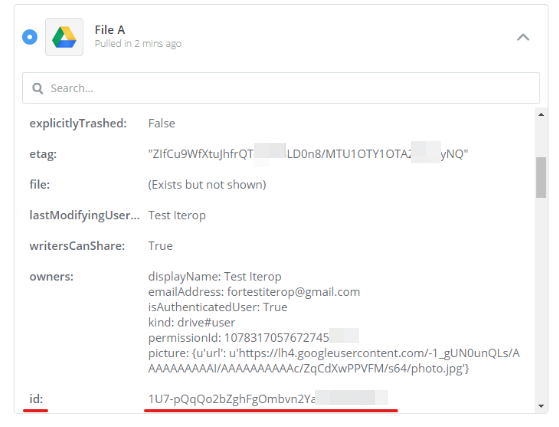
Zapier wants to test the functionality by asking you to select a file.
In your Google Drive, import a file into the folder interfaced with Zapier.
Then come back to Zapier, to check that he is present.
Create the process in Iterop
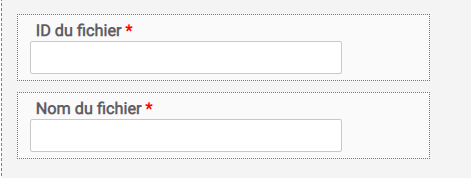
Once this step is completed, create your process that will be launched by Zapier. In our test case, it will accept two inputs, the Google Drive ID of the file and its name.
The process will then download it to Google Drive and display it in a subsequent task. (To set up a Google Drive service, go to the Services documentation chapter.)
In order for zapier to connect to the Iterop API, it needs to create an access to it. Go to Iterop Design in the Administration tab, create the access for Zapier and keep the key secret carefully.

Enable the Zapier / Google Drive connection
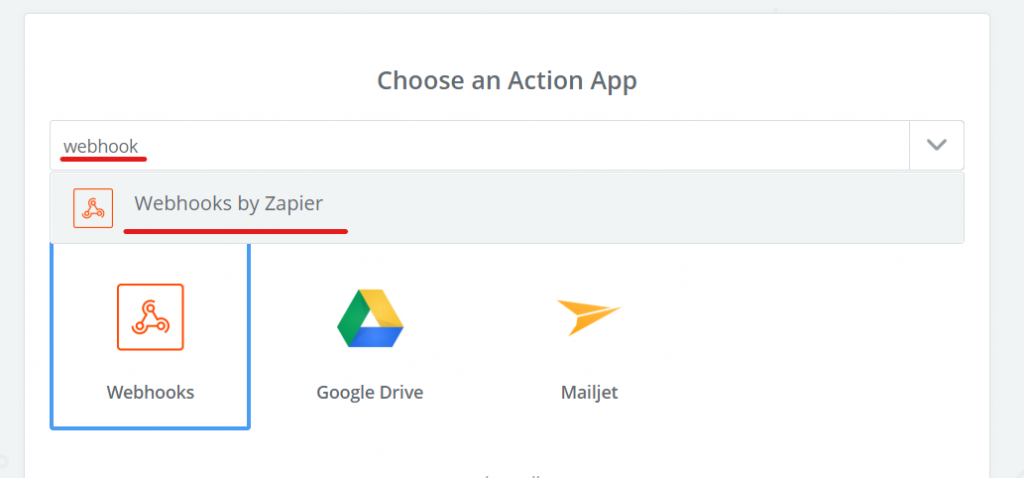
Let’s go back to Zapier. Now you have to configure the action. Search and choose the “Webhooks by Zapier” application.
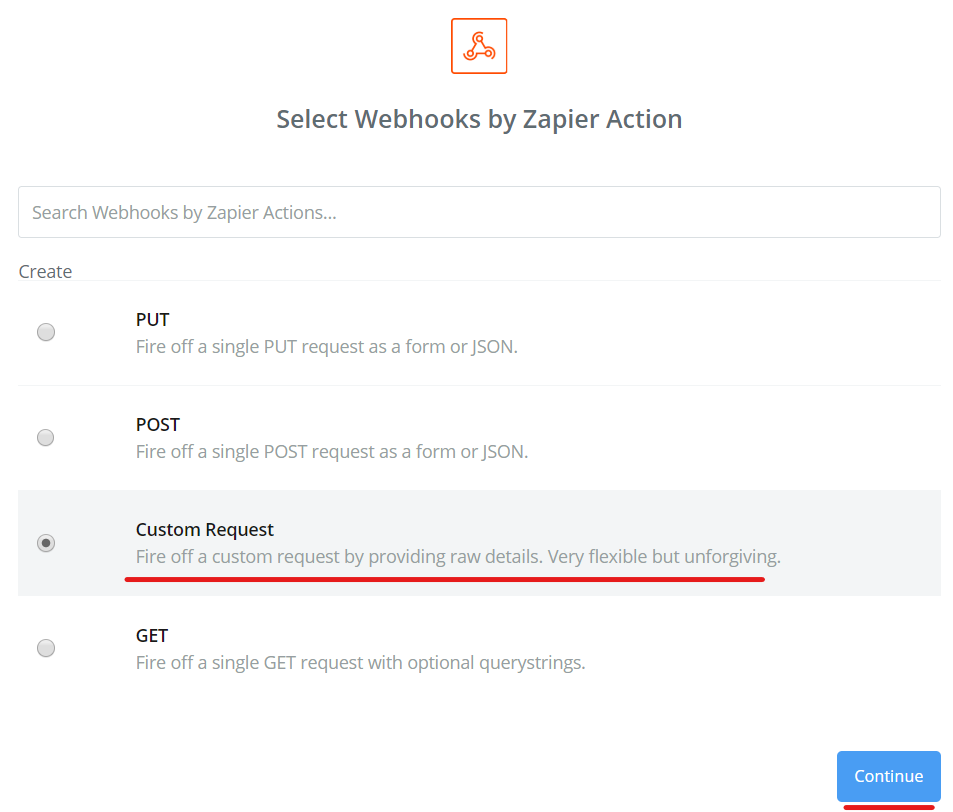
Select the “Custom Request” method and click “Continue”.
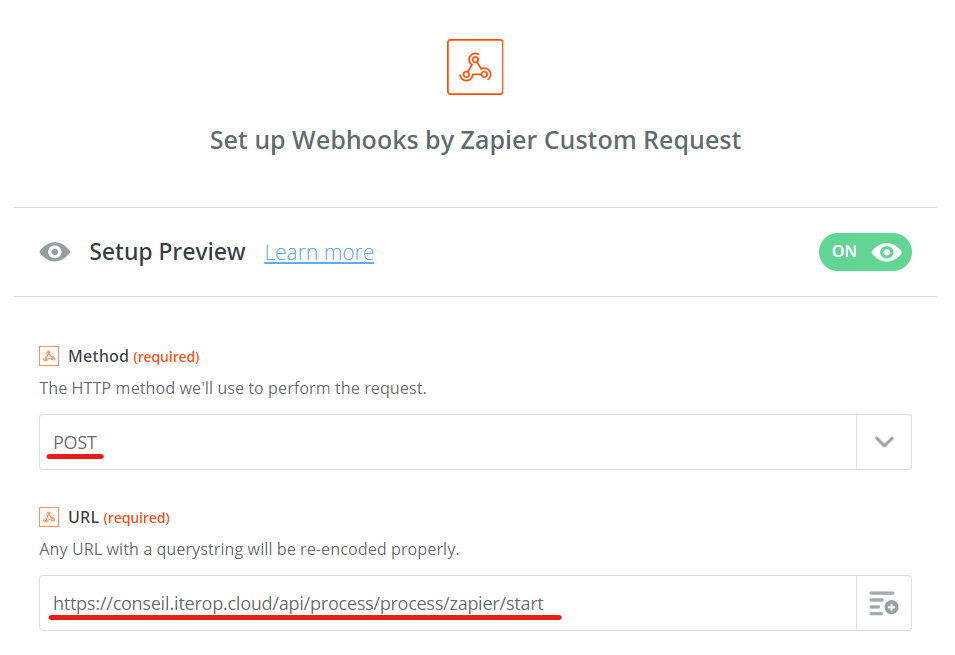
Now you have to configure the Webhook. Choose the POST method and enter the URL of the targeted API. Here we will use the process launcher.
In “Data”, put the information (JSON here) needed for the api. At the top right of the text box, there is a button that allows you to use values retrieved by the trigger (here, the file title and ID).
In the “Basic Auth” section, if the Iterop instance is in “Base64” access method, put the identifier key and the secret key separated by a pipe ( | ).
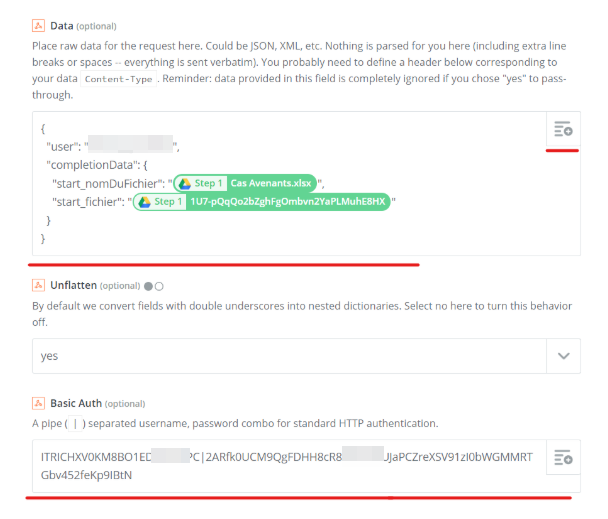
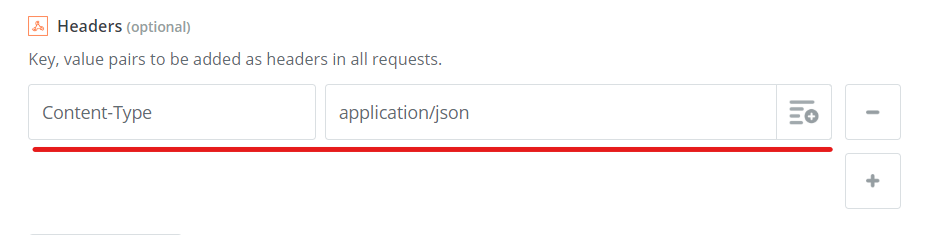
In the “Headers” section, enter all the information required for the api. In our case, as we send data in JSON format, we have to add the “Content-Type” key and the value “application/json”.
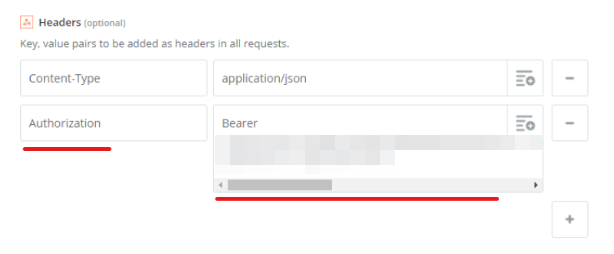
In case the Iterop instance is in “jwt” access method, do not fill in “Basic Auth” but, underneath in the “Headers” section, the “Authorization” key and as value the Bearer and its key.
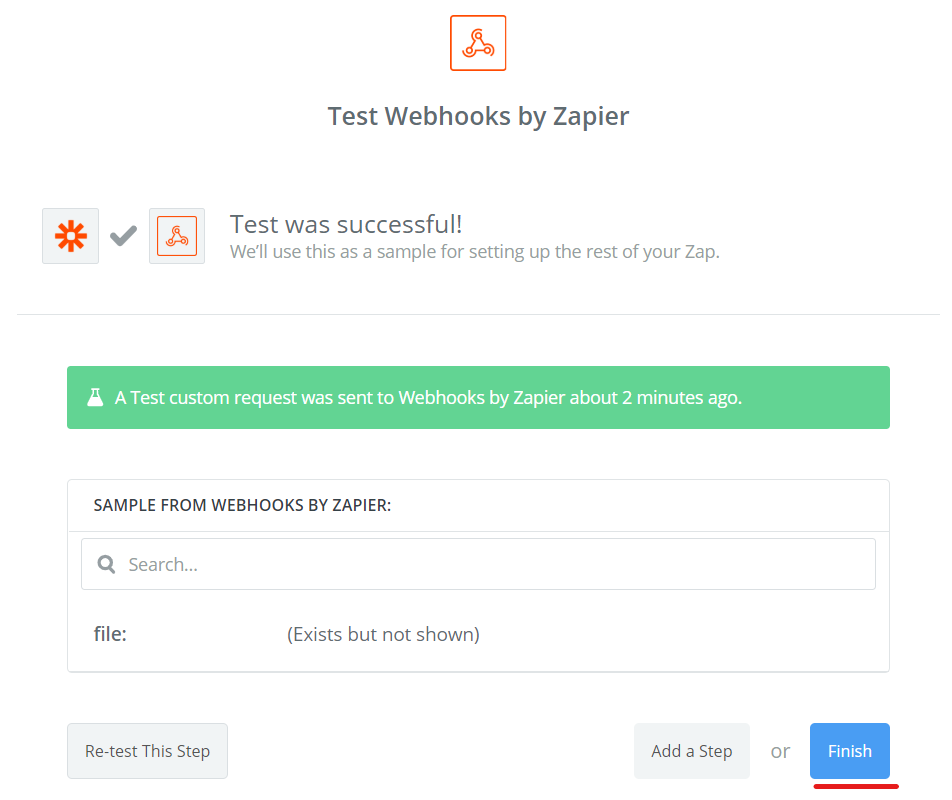
Once the configuration is complete, Zapier offers us to test the webhook. If the test is conclusive, click on “Finish”.
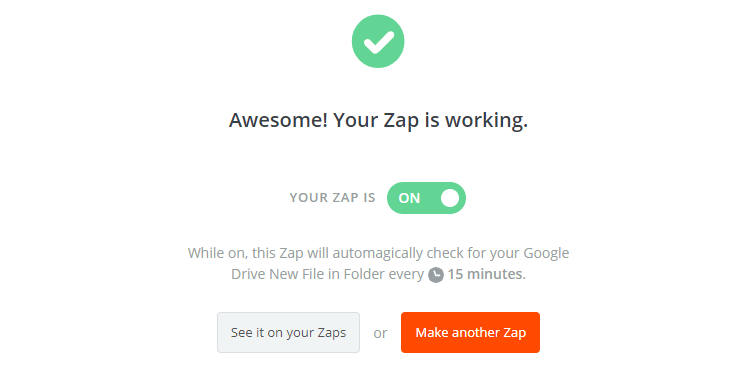
Now all you have to do is activate your Zap!