
Function and principle of dependency tables
A dependency table contains a set of dependencies between two “lists”. These lists can be of three different kinds:
- A value list (see Dynamic Value List)
- From the users
- Groups
A dependency will therefore link two elements together. This will make it easier for IteropPlay users to enter information by automatically offering them data linked to another, or by restricting their choices.
From the configuration of a process in IteropDesign, it is possible to link two variables together through a dependency table. The linked variable may be located in the same form as the variable on which the dependency is based (in this case, a change in value will automatically change the linked variable) or be in two different forms (in this case, the linked variable will be based on a past value).
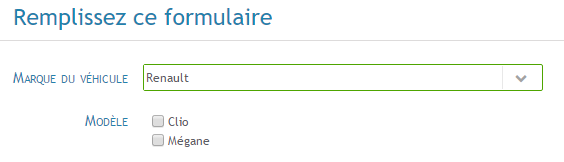
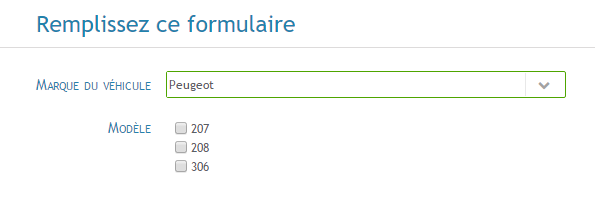
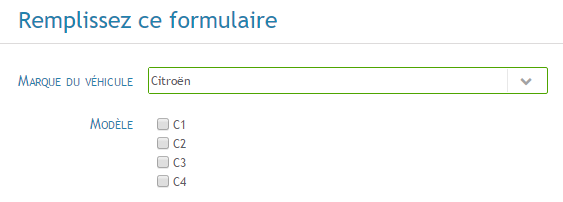
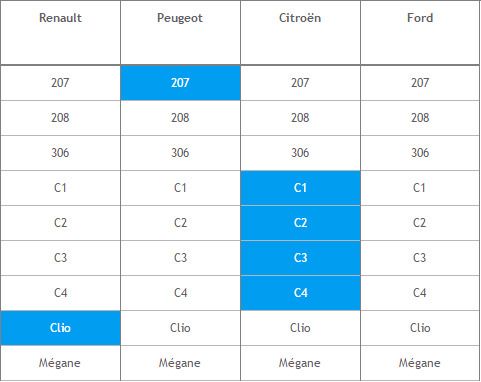
Example : We have two lists of values, the first one containing 3 different makes of vehicles and the second one containing the models of these makes. We do not want the user to be able to choose the Peugeot brand and the C4 model for example. Once the dependency table between these two lists is configured, here is the result on IteropPlay :
Interfaces
There are two graphical visualizations that allow you to view/change dependency tables.
Grid View
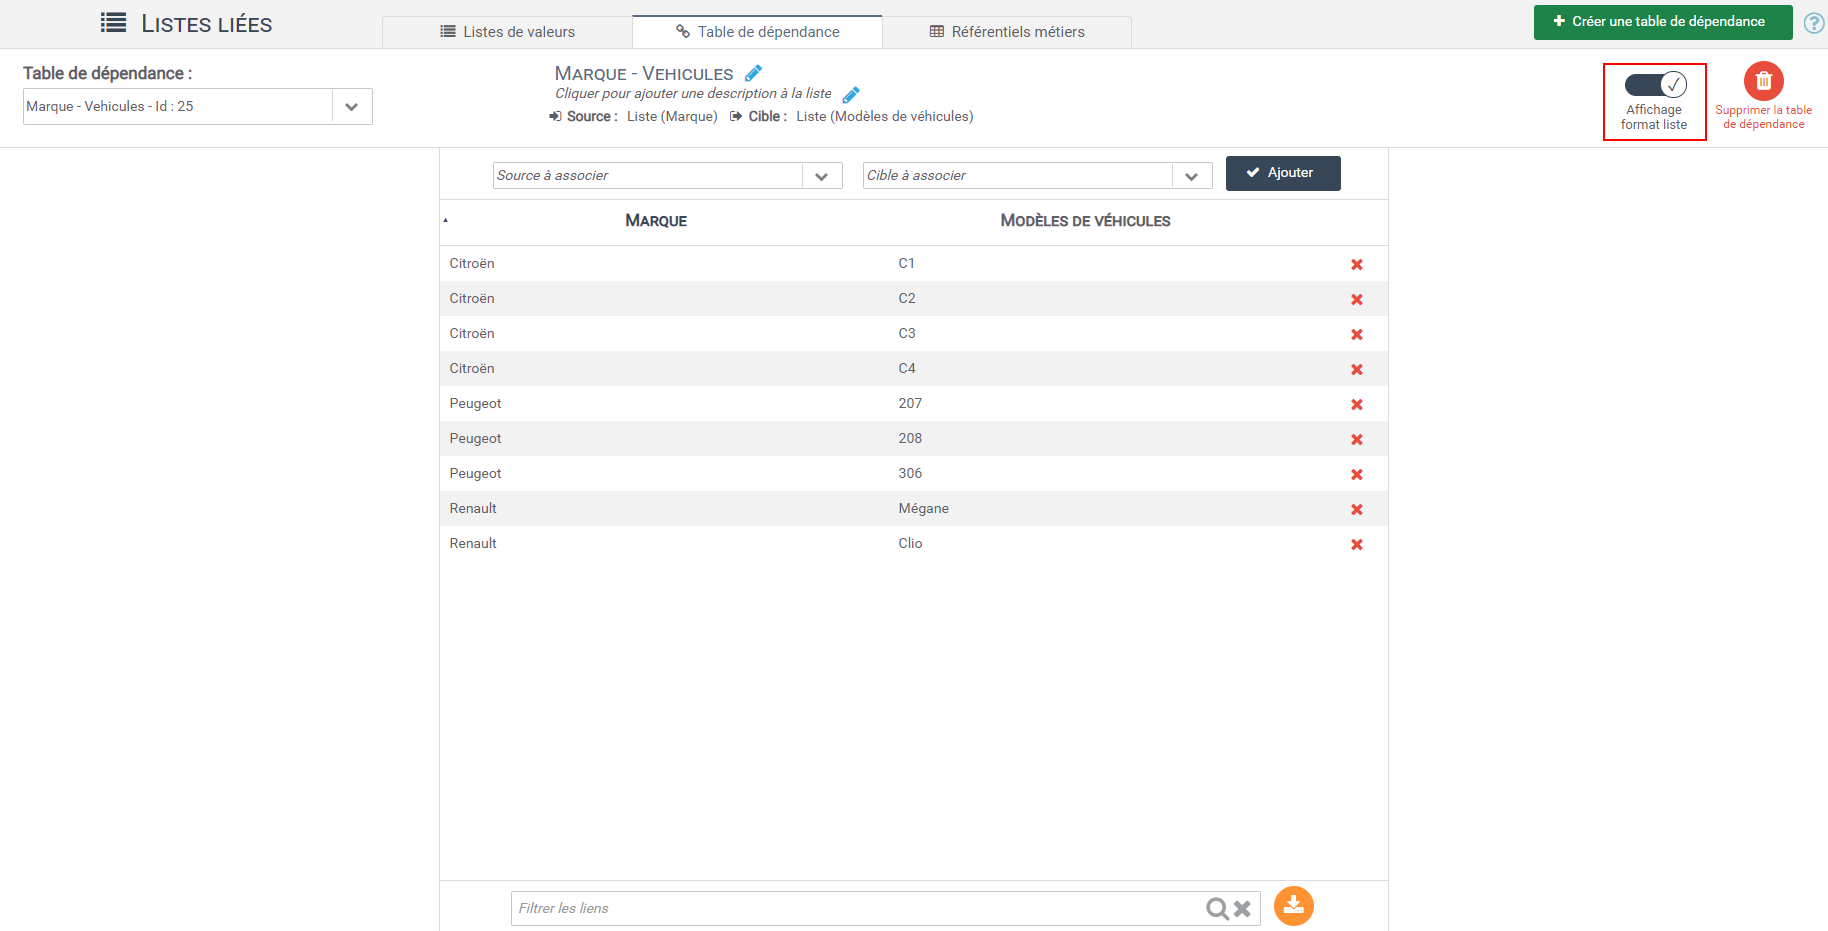
List View
Creating a new dependency table
You can edit and create dependency tables by following these steps:
- Click on the “Linked Lists” tab in the IteropDesign menu.
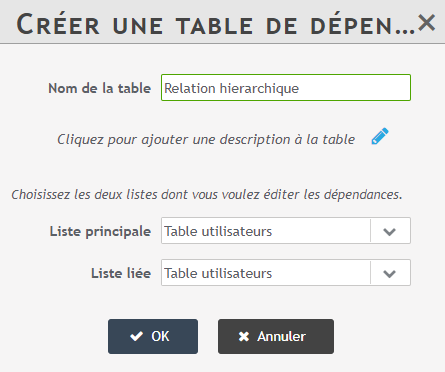
- Select “Dependency table” from the tab at the top of the page. By clicking on the button at the top left of the interface, a new window opens:
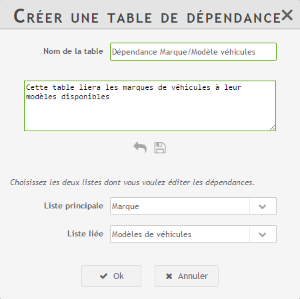
You must choose a name and fill in the description. Choose which lists will be linked together. The main list corresponds to the list whose elements impact the elements of the linked list.
Example : here, it is the choice of the make of the vehicle that will imply the restriction of the available vehicle models and not the opposite. The main list will therefore be “Make”, and the linked list “Vehicle models”.
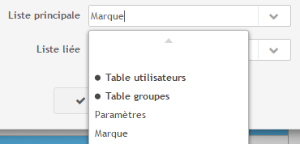
You can choose to link users or groups by selecting the value “Table users” or “Table groups” :
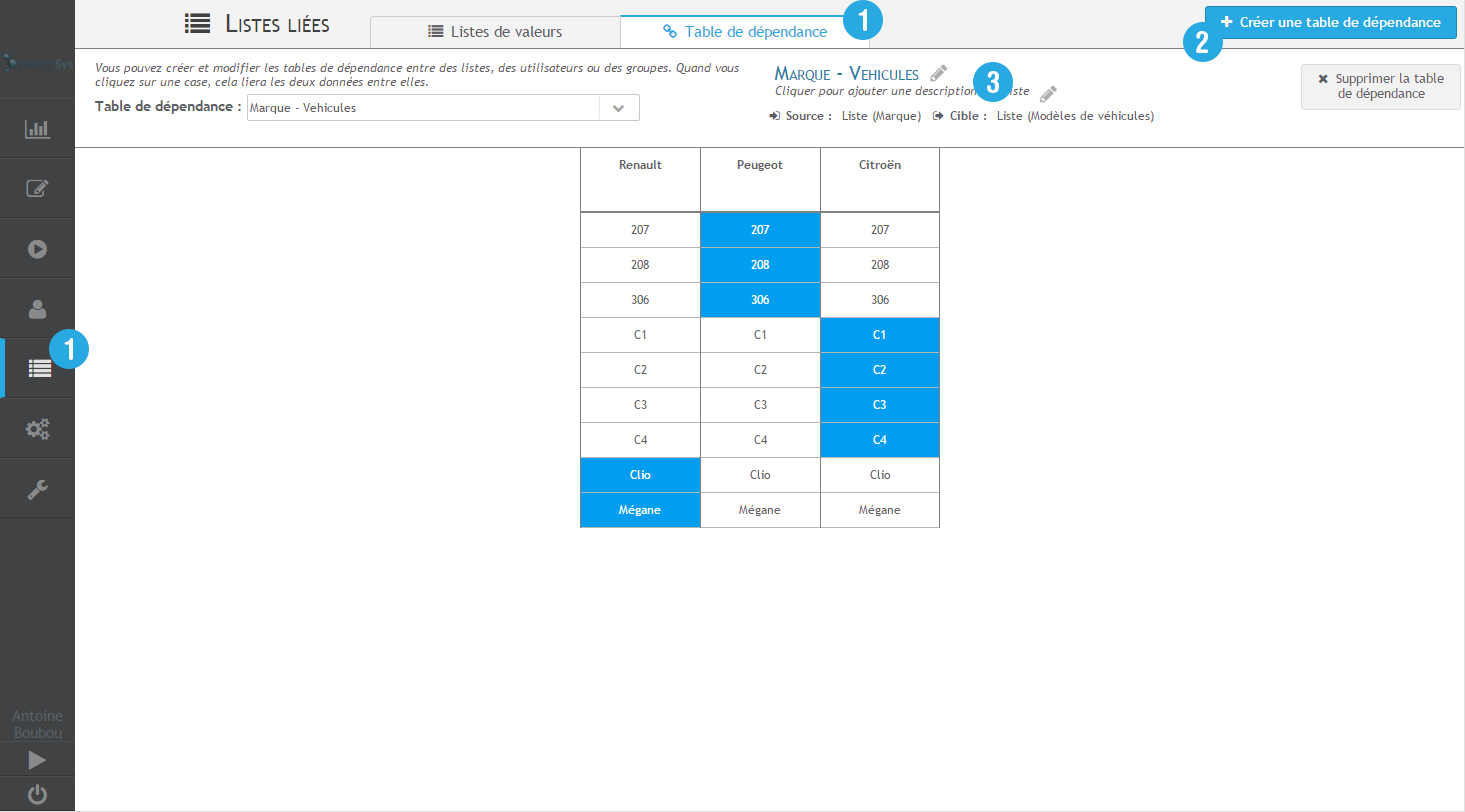
Once validated, this table will be displayed in the interface with, header, the elements of the main list and in the array, the elements of the linked list.
You can change the name as well as the description by pressing the edit buttons (small blue pencils). The choice of the main list and the linked list are then no longer modifiable (you have to create a new dependency table if you want to change one of these two parameters).
Linking two values together
You can link as many values as you want. Several elements can be linked to a single element, only a “1:1” link can be made (i.e. one element is only linked to one other element) or even no link at all. These different combinations create different behaviors in the IteropPlay interface as detailed in the next chapter.
Example: Linking the Peugeot brand and the 207 model
With the “Grid” view
To link two values together, simply click on the box in the table. This is coloured blue and indicates that a dependency exists between these two data. Clicking on the same box again deselects it and the dependency is then removed.
The registration is done automatically with each of your clicks.

With the “List” view
To create a dependency from a list view, simply select the two elements to be linked using the drop-down panels and click on “Add”.
With the API
It is also possible to carry out operations/changes on dependency tables with the PLC. For this, do not hesitate to consult the page dedicated to this use.
Behavior in IteropPlay
Depending on the type of dependency (multiple, 1:1, none) and the type of variable used, the behavior in IteropPlay is different.
Variables are necessarily pick lists (or users and groups) which may or may not be multiple-selection lists, and may or may not be restricted.
In the following table we will continue with the example of brands and models, to which we have added a brand that will have no associated models. We have also modified some dependencies to create 1:1 (one-to-one) relationships. Here is the corresponding dependency table:
Dependence 1:1 : Renault and Peugeot (only one model is linked to one brand)
Multiple dependency : Citroën (several models for one make)
No dependency : Ford (no model is associated)
Example: Assigning a task to the line manager of an actor
It is possible, using linked lists, to assign an upcoming task to the supervisor. This paragraph explains step-by-step how to do this.
Of course, this is only an example, which can be declined (assignment to a colleague, assignment to a replacement, to a department, etc.).
Creating the Dependency Table
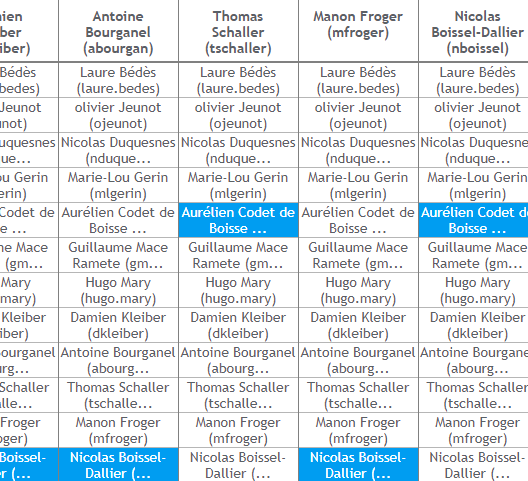
As a first step, it is necessary to create the dependency table that will be used for hierarchical relationships. This dependency table does not link value lists, but the user table, with the user table itself (see image below).
Following this, it is necessary to select, for each user (column), his or her line manager (row). Here is an example taken from internal relations at Iterop.
Of course, in the case of a company with a high number of users, it is quite possible to use our API to update this dependency table.
Creating the form
It now remains to create the form that will generate the dynamic assignment itself. To do this, two fields must be created:
- The logged-in user field
- The hierarchical user field
Creating the logged-in user field
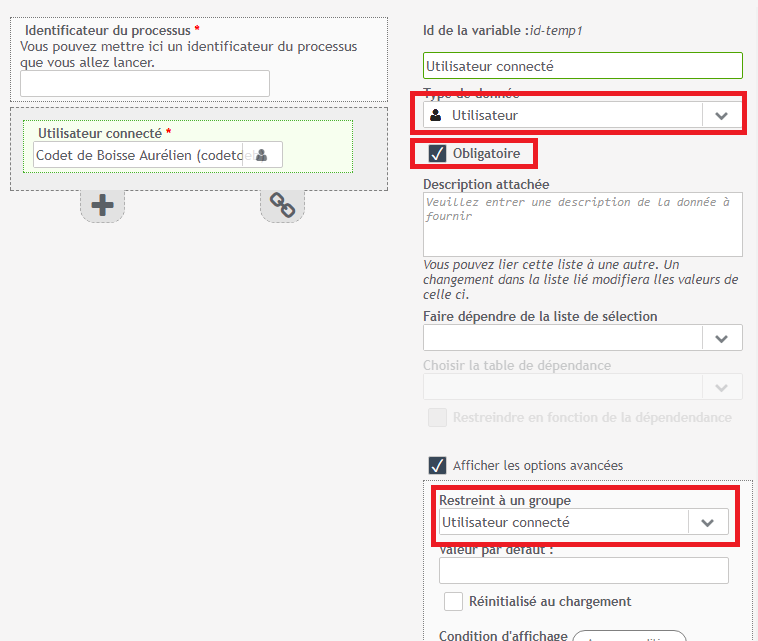
It is a question of creating a user type field, mandatory, with the option of restricting it to the “Logged-in user” group.
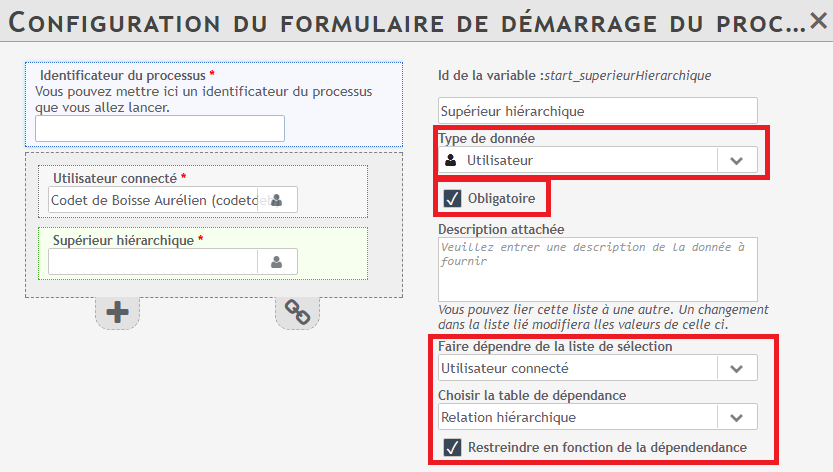
Creating the hierarchical user field
Now you have to create a second user field, which is also mandatory. This field will depend on a selection list: “Connected user”, using the dependency table previously created: “Hierarchical relationship”. The option “Restrict according to dependency” must be selected, as this prevents the logged-in user from being able to modify the result of the linked list.
Assigning the Line Manager to the Desired Task
In the configuration part of the tasks that must be assigned to the line manager, you now just have to go to the “Dynamic assignment” tab, select “By user type variable”, and finally select the previously created variable (called here “Line manager”).

From now on, this task will be automatically displayed to the line manager of the person who performed the task in which the above form was launched.

